# MCP Integration Guide
# Overview
CJ Dropshipping provides an MCP (Model Context Protocol) Server that allows AI assistants to directly call CJ's API capabilities. Through MCP, you can use natural language in AI platforms such as ChatGPT and Claude to search products, query orders, manage logistics, and more — no manual code integration required.
# What is MCP?
MCP (Model Context Protocol) is an open standard protocol developed by Anthropic that allows AI models to call external tools and services in a standardized way. The CJ MCP Server wraps core CJ API operations as a set of callable tools available to AI clients.
# Available Tools
| Tool | Description |
|---|---|
search_products | Search for CJ products by keyword, price range, category, etc. |
query_sku_details | Query product variant details and pricing |
get_order_list | Retrieve order list by status, time range, or order ID |
get_pay_order_list | Retrieve pending payment orders |
create_order | Create a new CJ order |
calculate_freight | Calculate logistics freight for a product |
get_logistics_timeliness | Query logistics timeliness for a destination |
get_warehouses | Get available warehouse list |
list_shops | Get authorized store list |
list_disputes | Query dispute list |
get_dispute_detail | Get dispute detail information |
create_dispute | Create a new dispute |
cancel_dispute | Cancel an existing dispute |
merge_orders | Merge multiple orders into one |
check_login_status | Check current login status |
verify_credentials | Log in with email and password |
add_to_cart | Add a product to the shopping cart |
# Connection Methods
CJ MCP Server supports two connection modes:
| Mode | Transport | Best For |
|---|---|---|
| Local (stdio) | Standard I/O | Claude, CodeX, and more |
| Remote (HTTP) | StreamableHTTP | ChatGPT, any HTTP-capable client |
# Platform Integration Guides
# 1. Local Mode — Claude / CodeX and more
This guide covers the unified approach for running the CJ MCP Server locally in stdio (standard I/O) mode. Compatible with all AI clients that support local MCP APPS: Claude, CodeX, and more.
# Prerequisites
- Node.js >= 20.0.0 (recommended: use nvm (opens new window) for version management)
- Any AI client with local MCP stdio support
# Step 1: Clone and Build CJ MCP Server
git clone https://github.com/CJ-dropshipping/api-mcp.git
cd api-mcp
npm install
npm run build
After building, the entry file is at dist/mcp-server/index.cjs. Note the absolute path of the project (needed for configuration):
# macOS / Linux
pwd
# Windows (PowerShell)
(Get-Location).Path
# Step 2: Configure Your AI Client
Replace the XXXXXXXX placeholders with the actual paths on your machine, then follow the configuration for your AI client:
Claude
Edit the Claude Desktop config file (macOS: ~/Library/Application Support/Claude/claude_desktop_config.json, Windows: %APPDATA%\Claude\claude_desktop_config.json):
{
  "mcpServers": {
    "CJMCP": {
      "type": "stdio",
      "command": "/XXXXXXXX/node",
      "args": ["XXXXXXXX/cujia-api-platform-mcp/dist/mcp-server/index.cjs"],
      "env": {
        "CJ_ENV": "production",
        "CJ_LOG_LEVEL": "info",
        "CJ_LOG_FILE": "true"
      }
    }
  }
}
Restart the Claude app after saving.
CodeX
Edit the CodeX config file (macOS: ~/Library/Application Support/CodeX/config.toml, Windows: %APPDATA%\CodeX\config.toml):
[mcp_servers.CJMCP]
command = "/XXXXXXXX/node"
args = ["XXXXXXXX/cujia-api-platform-mcp/dist/mcp-server/index.cjs"]
startup_timeout_sec = 120

[mcp_servers.CJMCP.env]
CJ_ENV = "production"
CJ_LOG_LEVEL = "info"
CJ_LOG_FILE = "true"
Restart the CodeX app after saving.
Other MCP APPS
Refer to your client's MCP documentation and use these settings:
- Transport type:
stdio - Command:
/XXXXXXXX/node - Args:
XXXXXXXX/cujia-api-platform-mcp/dist/mcp-server/index.cjs
# Step 3: First-Time Login
After applying the configuration (restart or reload your AI client):
- Tell your AI:
log in to CJ account(or use theshow_login_formtool) - The MCP server will open the CJ login page — enter your CJ account email and password
- Once logged in, the token is encrypted and stored in a local
.cj-tokenfile — no need to log in again
# Usage Examples
Search for "wireless earbuds" products
Show my recent orders
Get details for order DP2605200604000336000
Calculate shipping cost to the US for this product
# Troubleshooting
| Issue | Solution |
|---|---|
| Tools not showing in client | Check config file syntax; restart your AI client |
node command not found | Install Node.js 20+; ensure node is in your PATH |
| Login failed | Verify CJ account email/password; check network connection |
| Viewing logs | Set CJ_LOG_FILE=true then check the local log file |
# 2. ChatGPT (Remote HTTP Mode)
ChatGPT supports connecting to CJ's official MCP server directly via HTTPS — no self-hosting required.
# Step 1: Create Your MCP Token
- Log in to your CJ account and go to the CJ API Authorization page (opens new window).
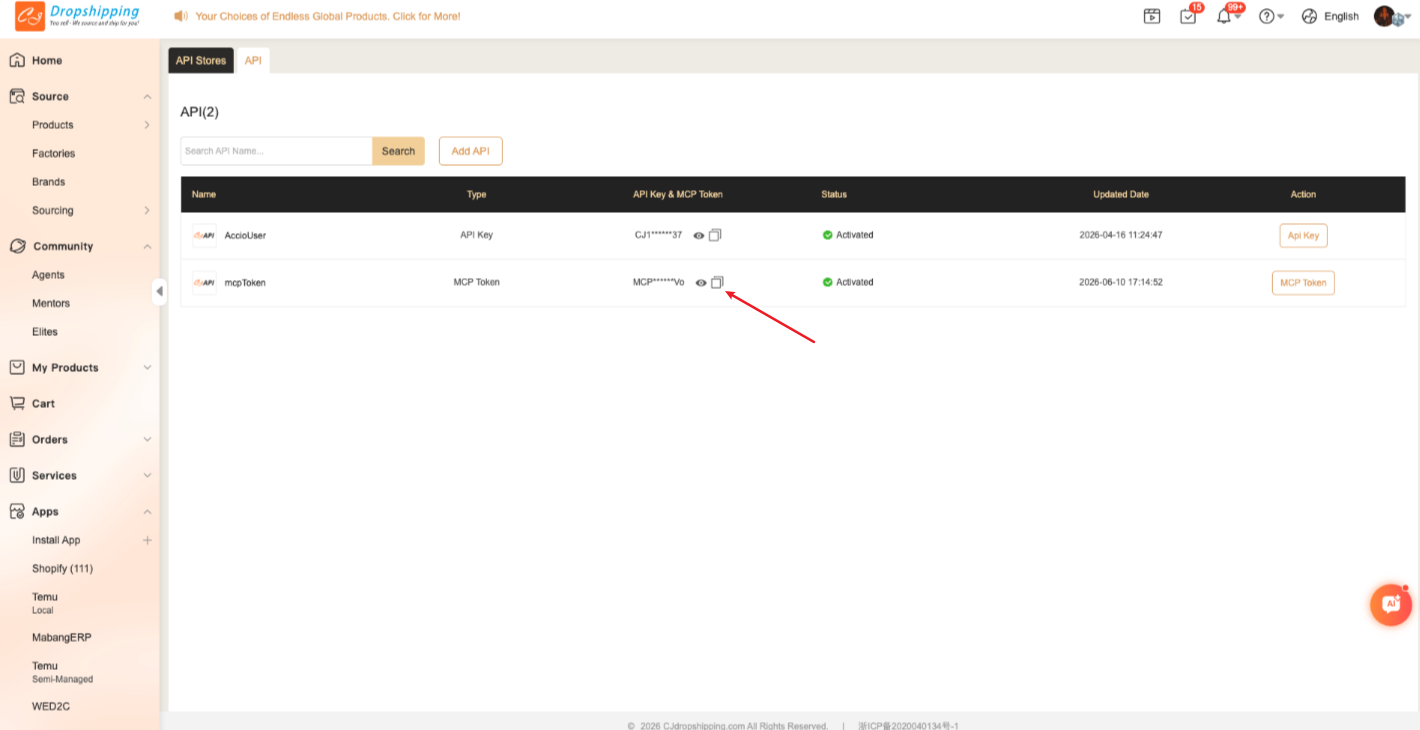
- Click Create to generate a new MCP Token.
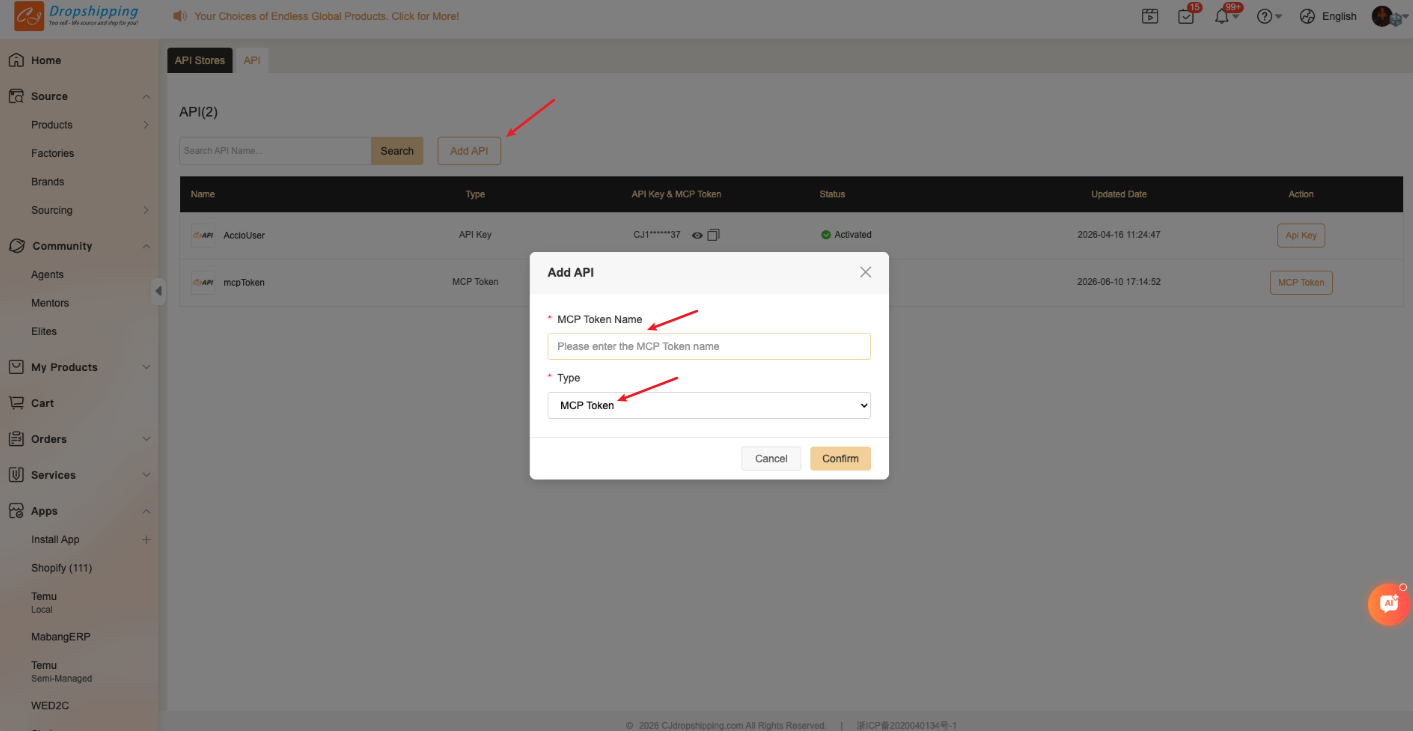
- Copy the MCP Token value — you will use it in the next step.
# Step 2: Create a ChatGPT App with CJ MCP
- Open chatgpt.com (opens new window) and go to Settings (bottom-left) → Apps → Advanced Settings.
- Enable Developer Mode.
- Click Create App.
- Fill in:
- Name: A recognizable name, e.g.
CJMCP-YourName - Description: e.g.
CJ Dropshipping assistant via MCP - MCP Server URL:
https://developers.cjdropshipping.cn/mcp/YOUR_MCP_TOKEN(replaceYOUR_MCP_TOKENwith the token copied in Step 1) - Authentication: Select No authentication
- Name: A recognizable name, e.g.
- Agree to the terms and click Create. Wait for the app to initialize.
# Step 3: Start Using CJ MCP in ChatGPT
- Open a new conversation in ChatGPT.
- Type
/CJMCP-YourNameand select your app from the suggestion list. - Start chatting with natural language, for example:
Use CJMCP-YourName to show my account informationSearch for "phone case" products on CJShow me my recent orders
Tip: If your MCP Token expires or becomes invalid, return to Step 1 to create a new token and update the MCP Server URL in your app settings.
# Multiple Accounts
To use multiple CJ accounts, create a separate app for each one:
- Repeat Step 1 for each account to obtain the corresponding MCP Token.
- In Step 2, use the account's token when creating the app, and give each app a unique name (e.g.
CJMCP-Account1,CJMCP-Account2). - Switch between accounts by typing
/AppNamein the chat to select the desired app.
# Refreshing the App's Tool List
When CJ MCP server adds new tools or capabilities, manually refresh your app to load the latest tool list:
- Go to ChatGPT Settings → Apps and open your CJ MCP app.
- Click the Refresh button on the app detail page and wait for the tool list to update.
# Authentication
# Local Mode (Claude / CodeX / etc.)
CJ MCP Server uses token-based authentication when running locally:
- Call
check_login_statusto check if already authenticated. - If not authenticated, call
verify_credentialswith your CJ email and password. - The token is encrypted and stored locally — you won't need to log in again on next startup.
Security Note: Your credentials are only used to obtain an access token from CJ's official API. The token is stored encrypted on your local machine and never transmitted to third parties.
# ChatGPT
Authentication for ChatGPT is handled via the MCP Token embedded in the MCP Server URL (see Step 1 of Section 2 ChatGPT setup above). No additional authentication step is required within the chat.
# Verifying Your Setup
After configuration, test with these commands in your AI client:
Check my CJ login status
Search for "phone case" products on CJ
Show me my recent orders
If configured correctly, the AI will call the appropriate MCP tools and return results.
# Troubleshooting
| Issue | Solution |
|---|---|
| Tools not appearing | Restart your AI client; check config file syntax |
| Authentication failed | Verify your CJ email/password; check CJ account permissions |
| Remote MCP connection error | Verify the server is running; check firewall rules and SSL |
| Tool call timeout | Increase proxy_read_timeout in nginx; check network connectivity |
npx not found | Install Node.js 18+ from nodejs.org (opens new window) |